Initiate flow V2
Overview
The Initiate Flow V2 API triggers a flow with custom variables. It enables integration with external systems such as payment gateways, Google Forms, or Calendly, and can also be used by internal development teams to trigger flows programmatically.
Send a request to the Initiate Flow endpoint with a payload containing at least one user identifier. This approach requires minimal to no custom code.
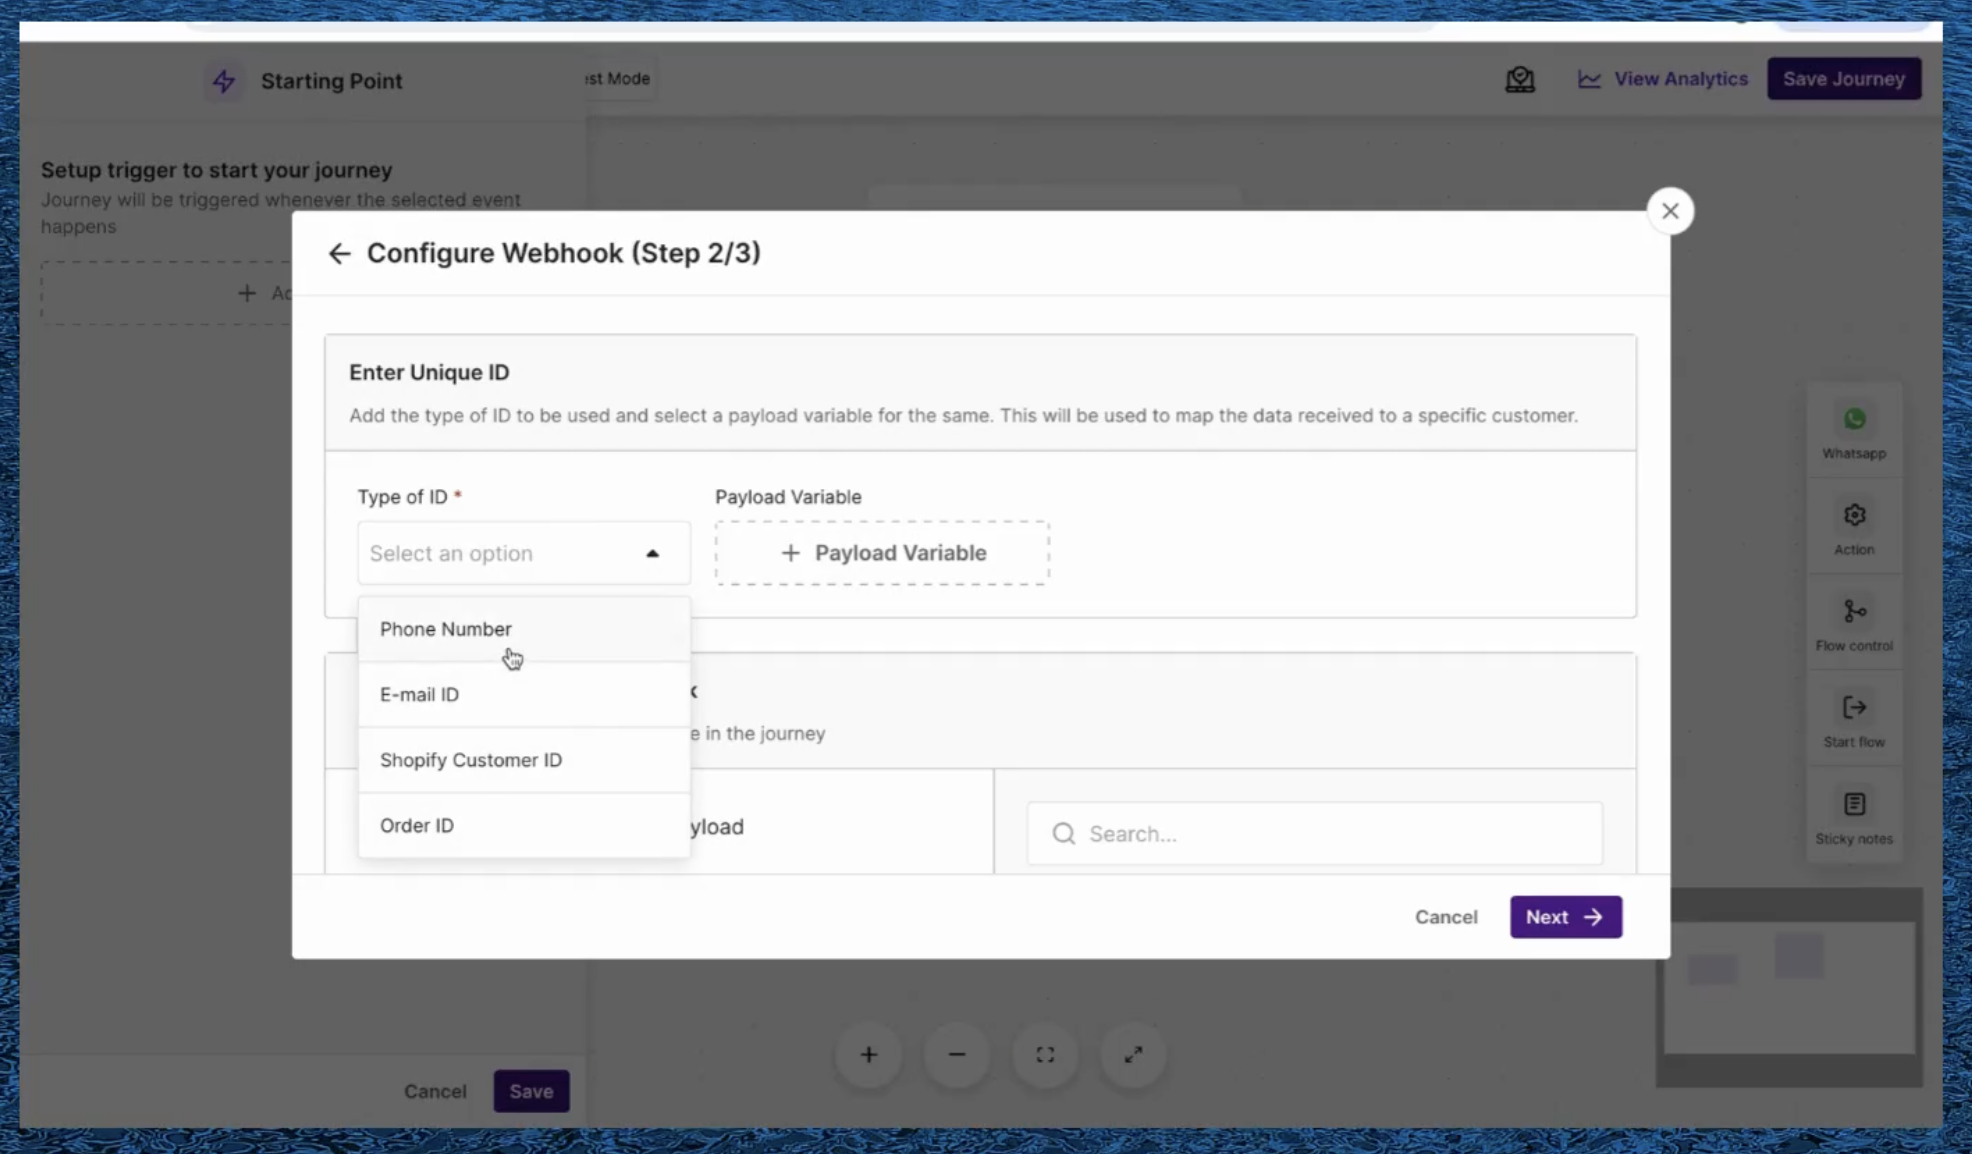
Valid identifiers:
- Shopify Order Id
- Shopify Customer Id
- Phone Number
The following steps describe how to configure and use the Initiate Flow V2 API.
- Create a new flow and set the trigger type to webhook. If working on behalf of a client and lacking direct access, coordinate with the client for the steps below.
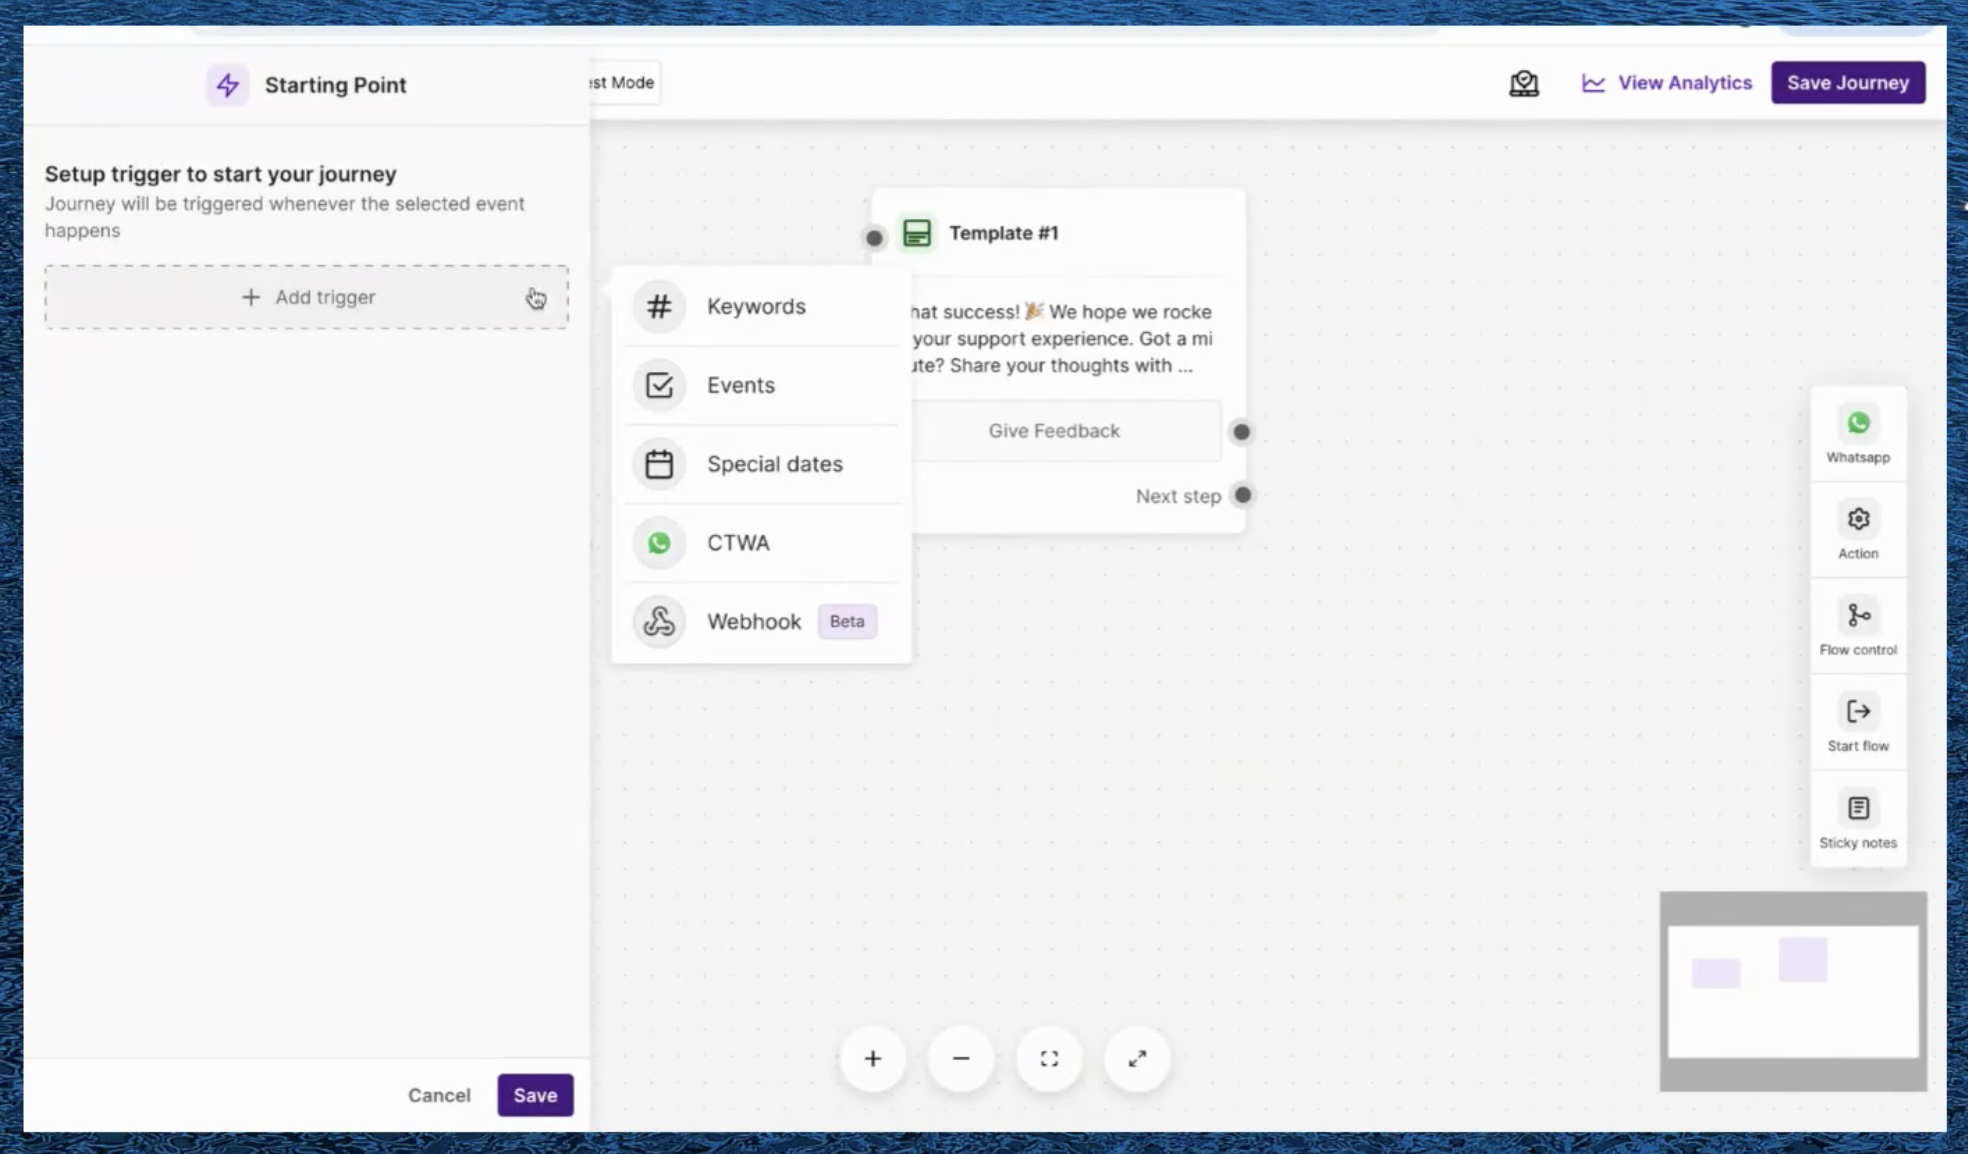
- After creating the flow, copy the generated endpoint URL.
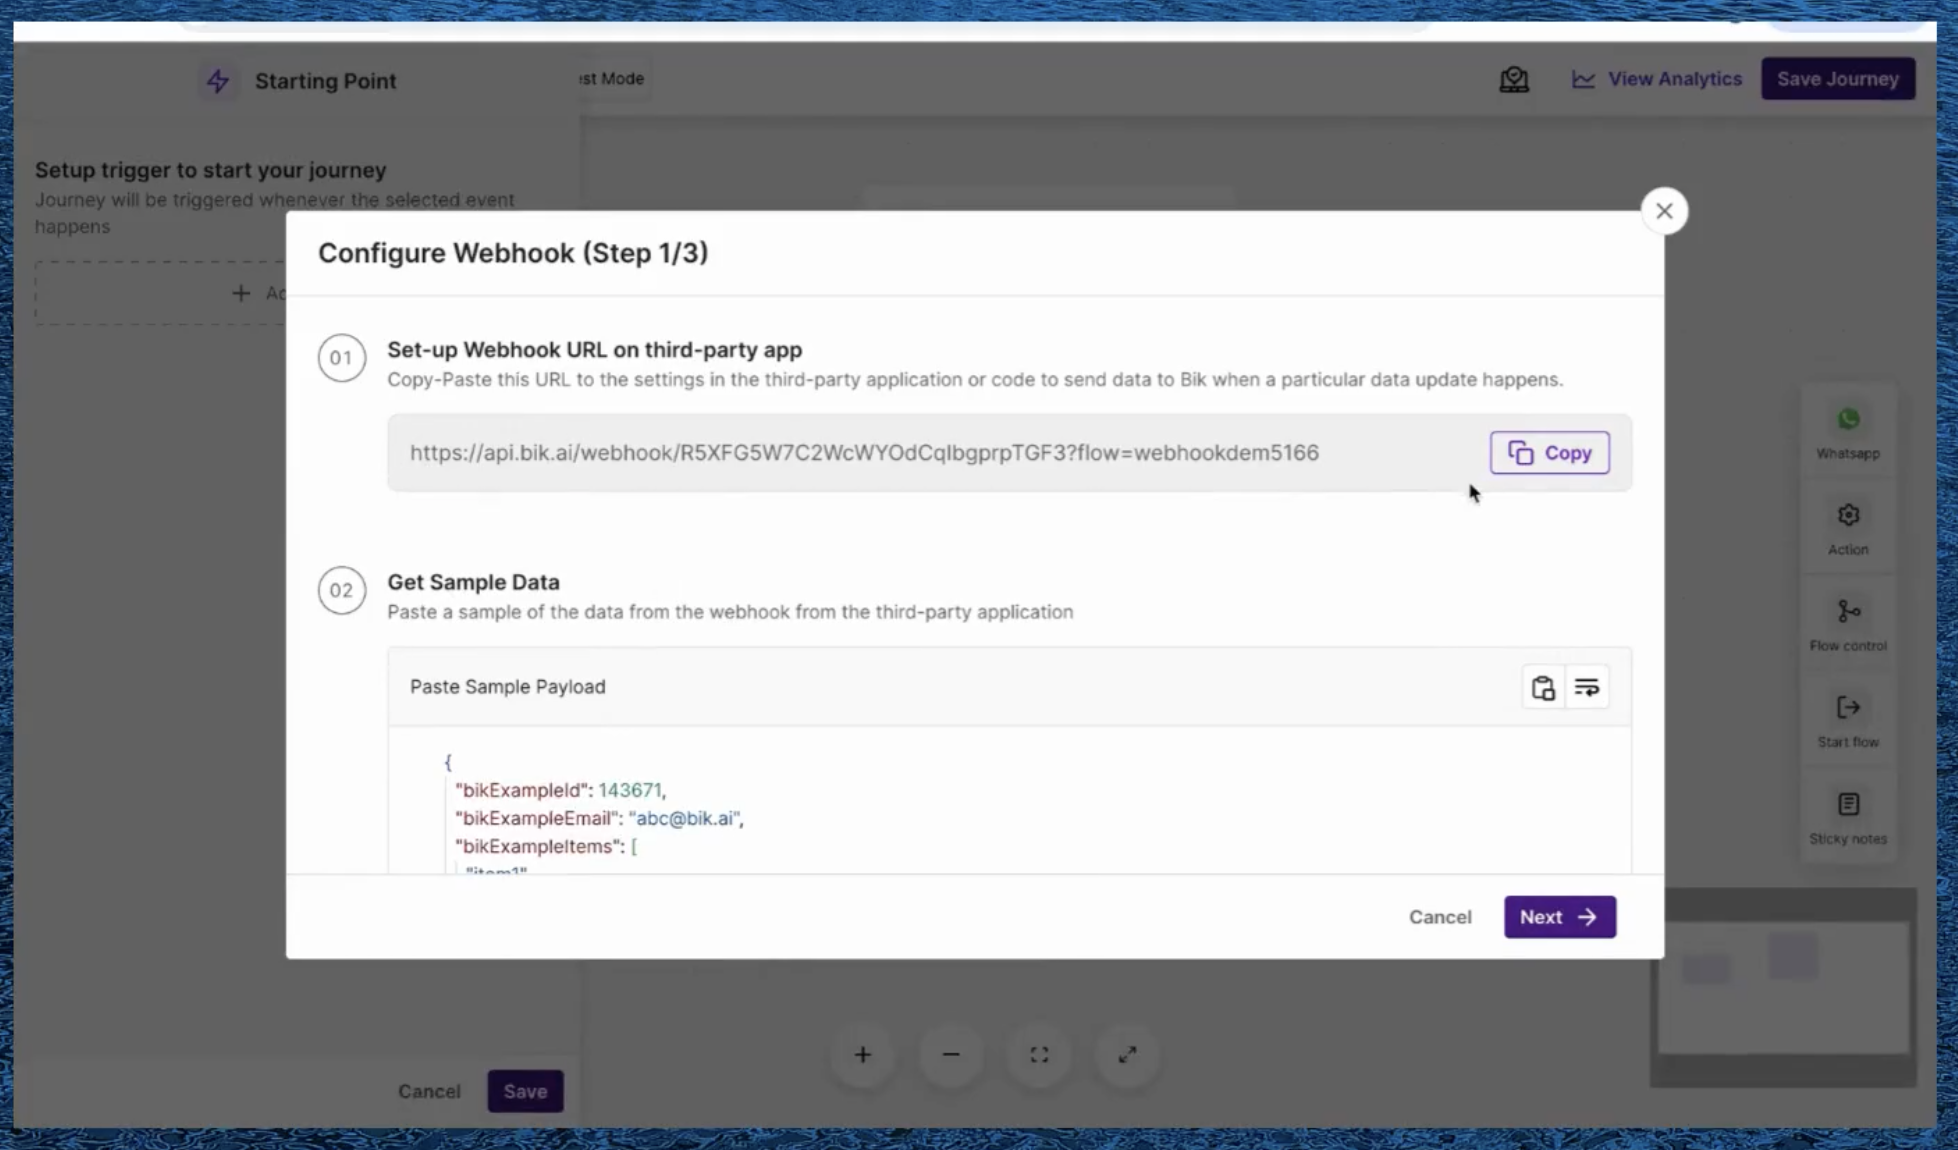
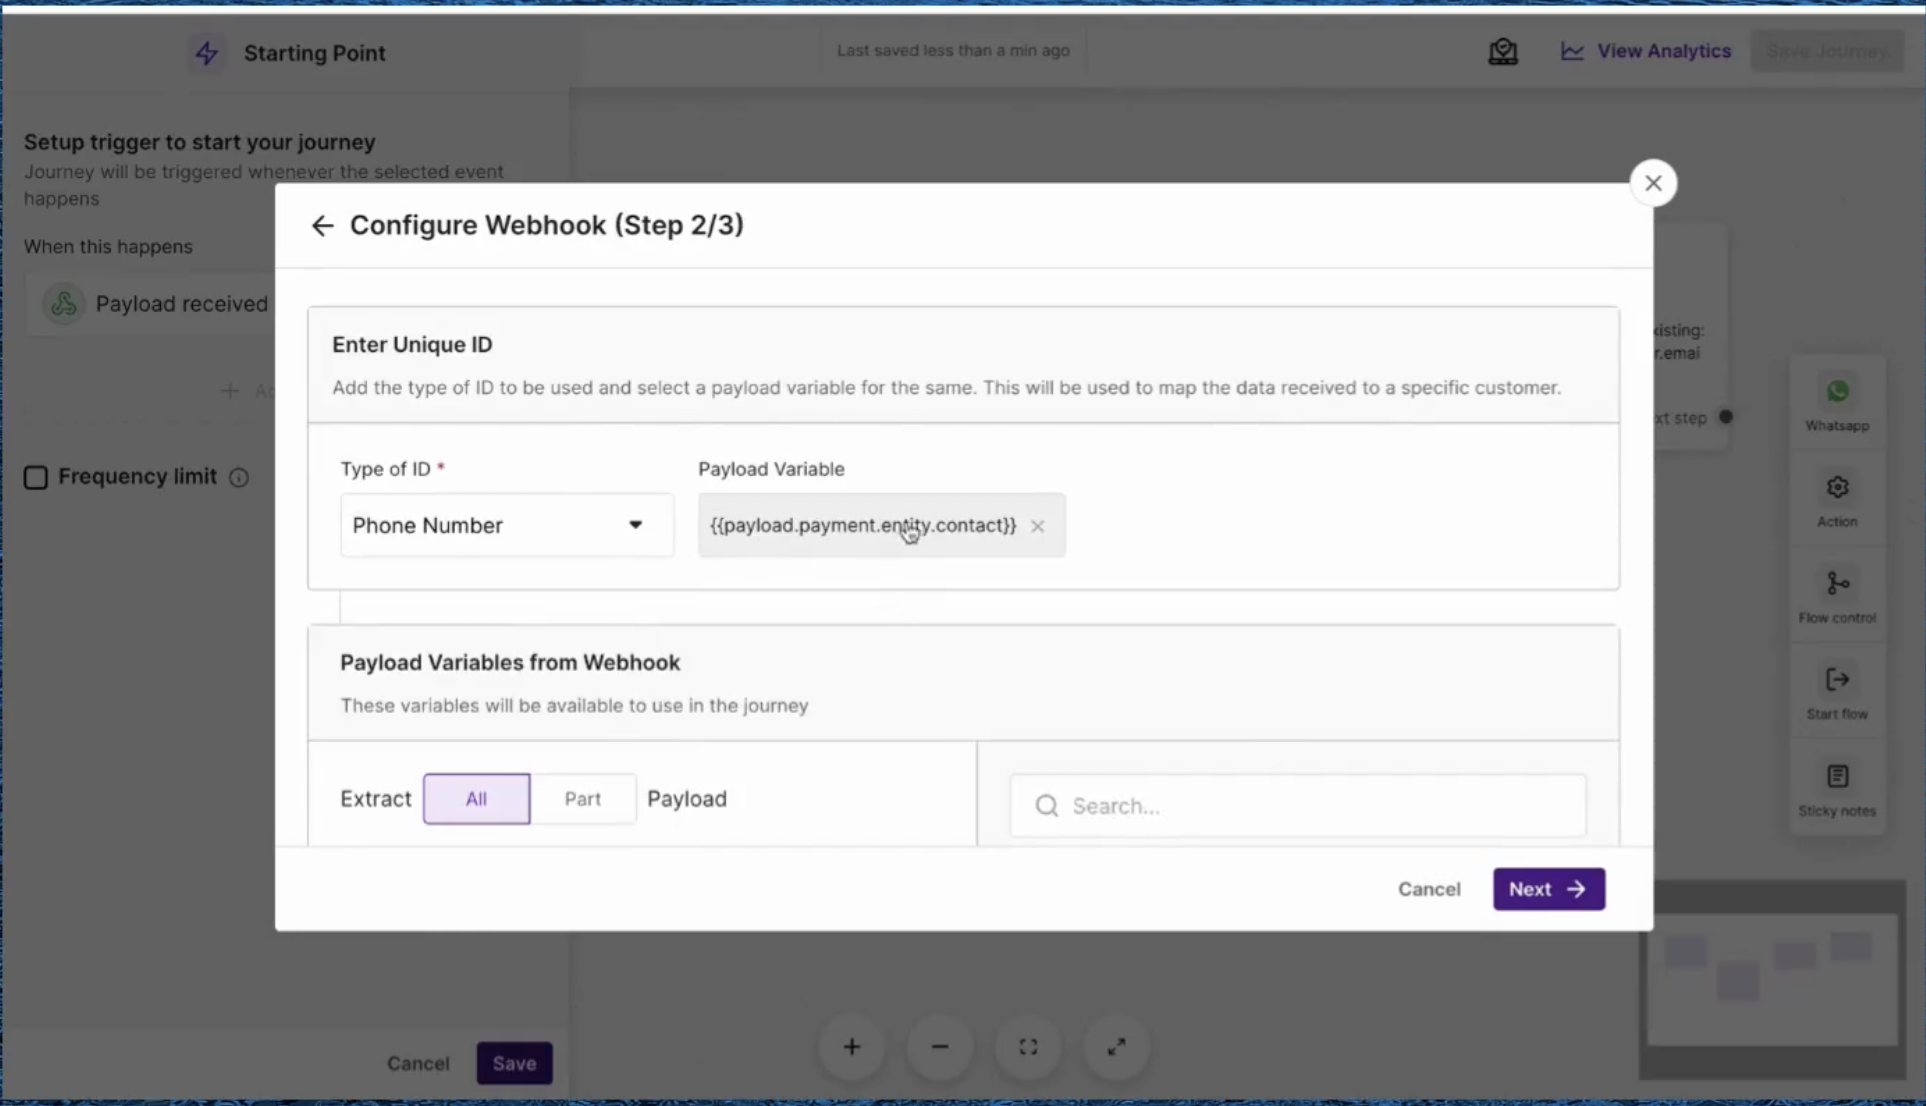
Paste a sample payload that represents the expected request body. This populates the available variables for use within the flow.
From the payload variables, select the one that serves as the customer identifier.
For example, given the following payload:
{
    "customer": {
        "name": "John Doe",
        "email": "john@bik.ai"
    }
}
The customer identifier variable would be customer.email.
Once configuration is complete, the flow is ready to be triggered by calling the endpoint.
The following example demonstrates how to integrate Razorpay with BIK using the Initiate Flow API.
Example: Razorpay integration using Initiate Flow API
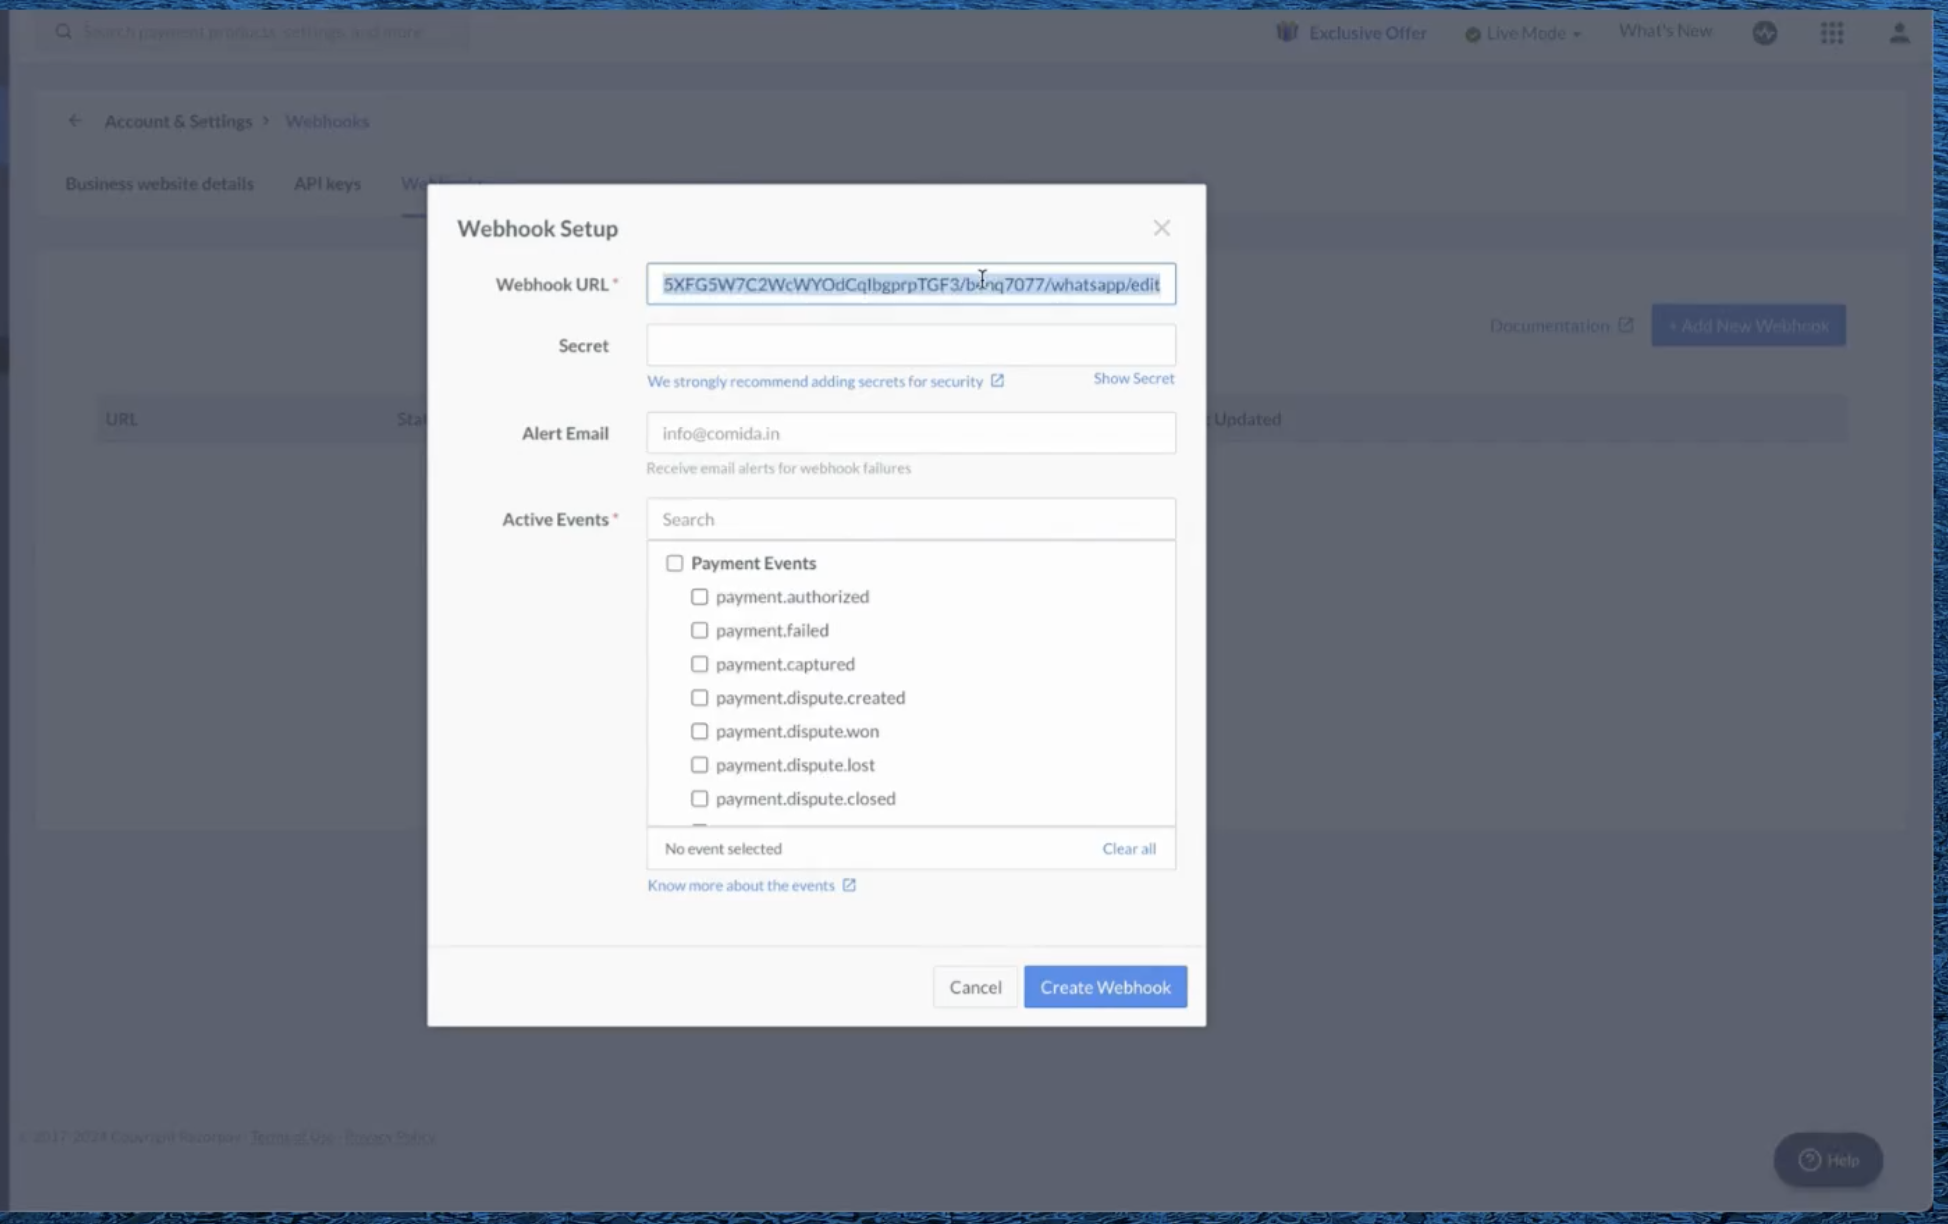
- Create a new flow and paste a sample Razorpay payload for the
payment.capturedevent. Copy the payload from the Razorpay dashboard.
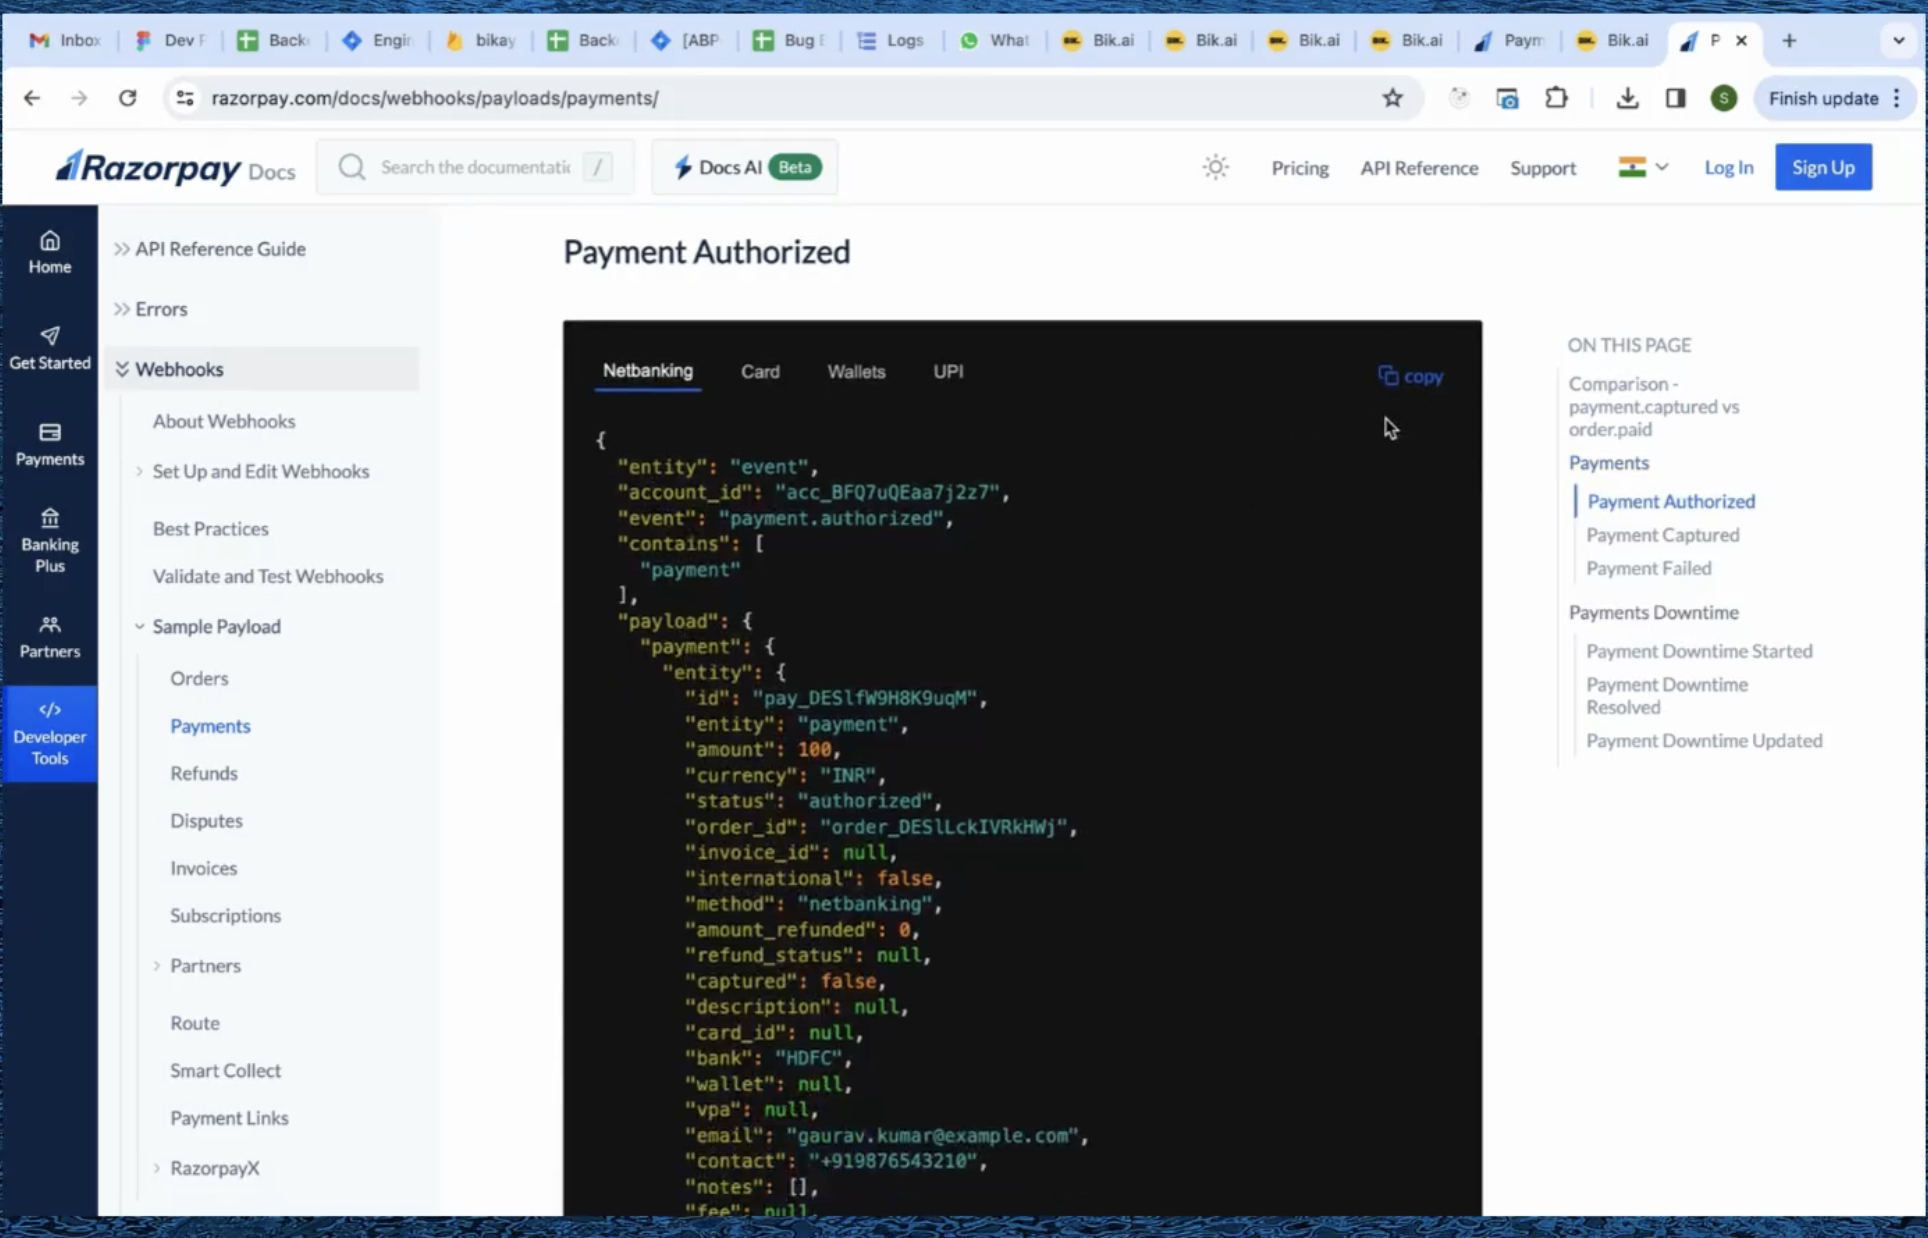
- Select the customer identifier variable from the payload.
Build the flow with the message content to send upon a successful payment.
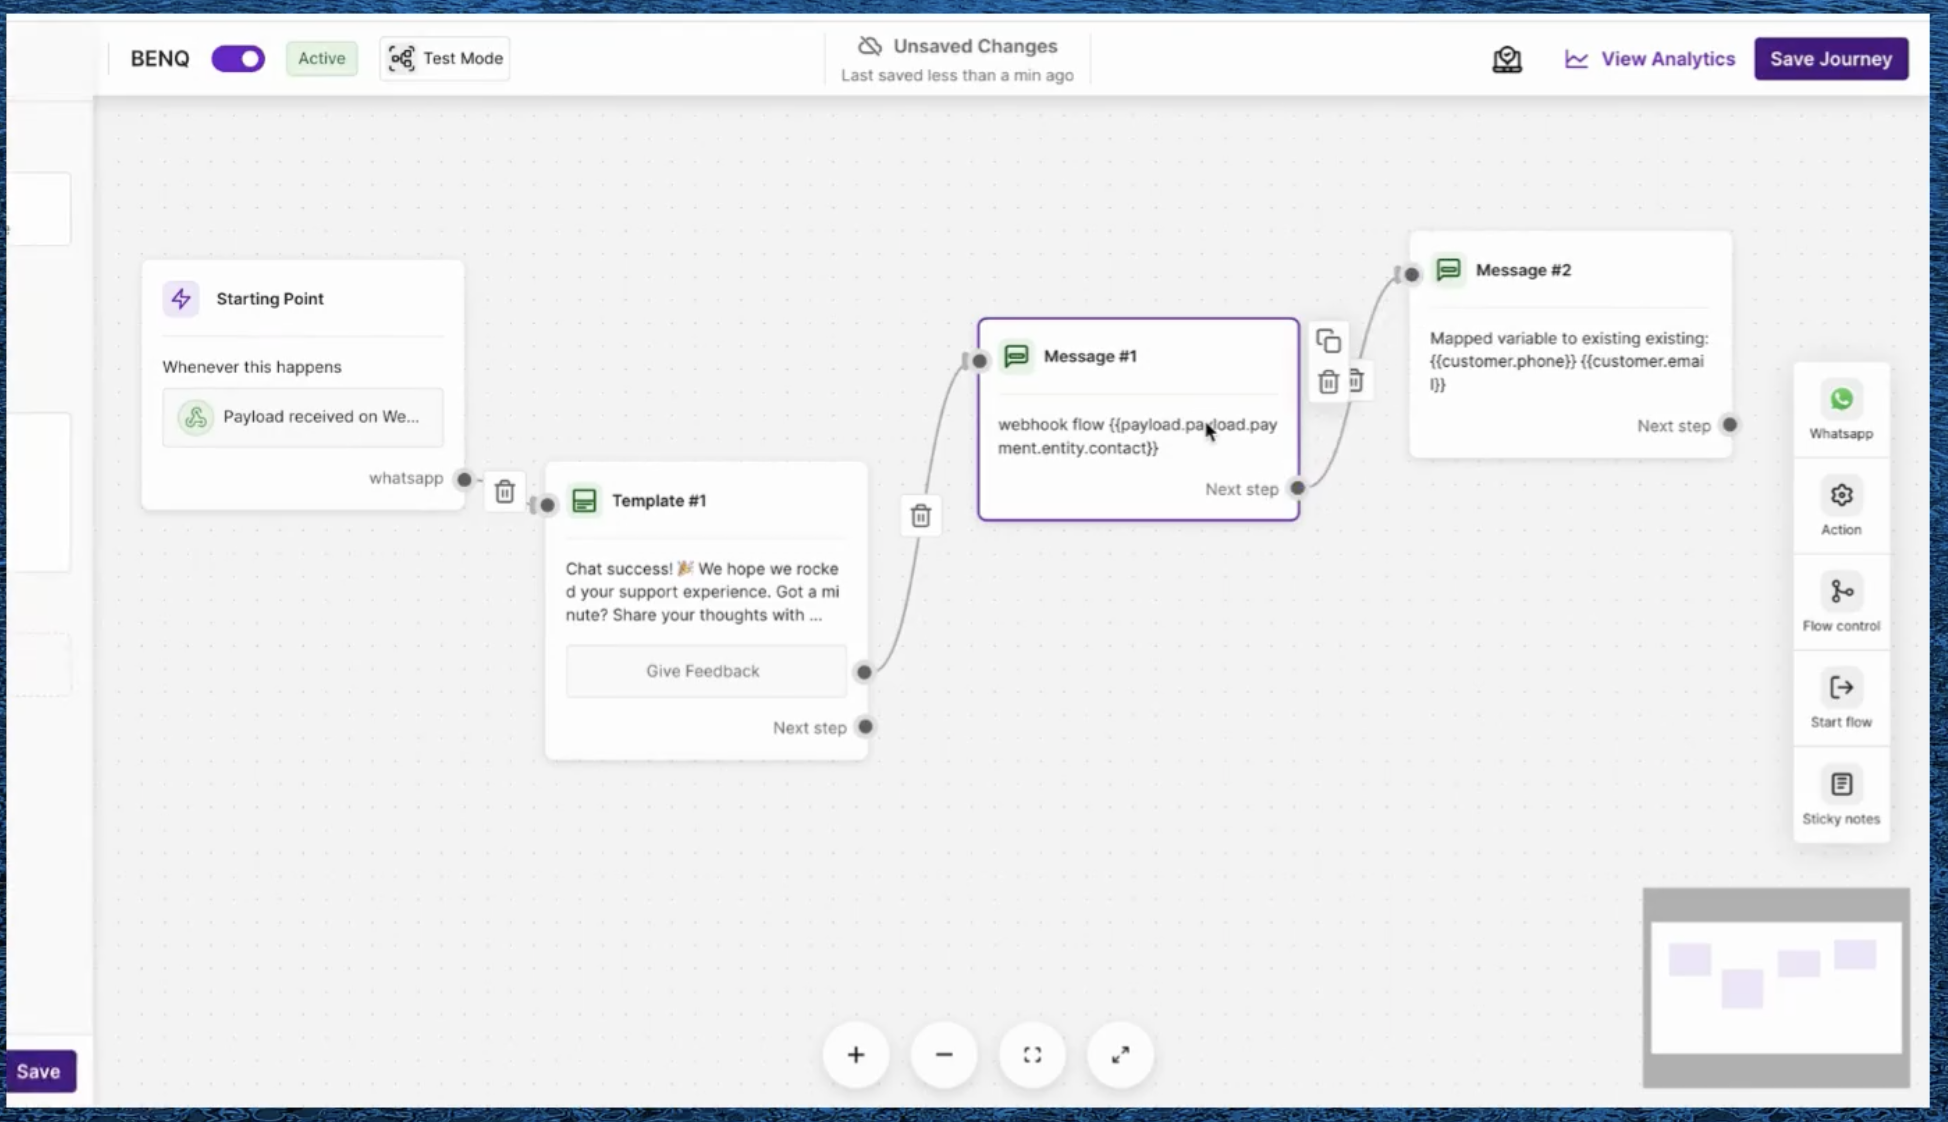
Add the endpoint URL from BIK to the Razorpay webhook configuration to complete the integration.
The Razorpay integration is now complete. This demonstrates connecting a third-party system to BIK without writing any code.